How To Setup Git Repository in Visual Studio 2015
Let’s set up a git repository in Visual Studio 2015… Let’s clone a repo into our local file system in Visual Studio Here are the things you need A git URL to clone the repo from Credentials for the git server Let’s get, started I am going to use our local Git server for this […]

06 Jul, 2021
Let’s set up a git repository in Visual Studio 2015…
Let’s clone a repo into our local file system in Visual Studio
Here are the things you need
- A git URL to clone the repo from
- Credentials for the git server
Let’s get, started
I am going to use our local Git server for this tutorial.
First, let’s get a URL to clone the repository from,
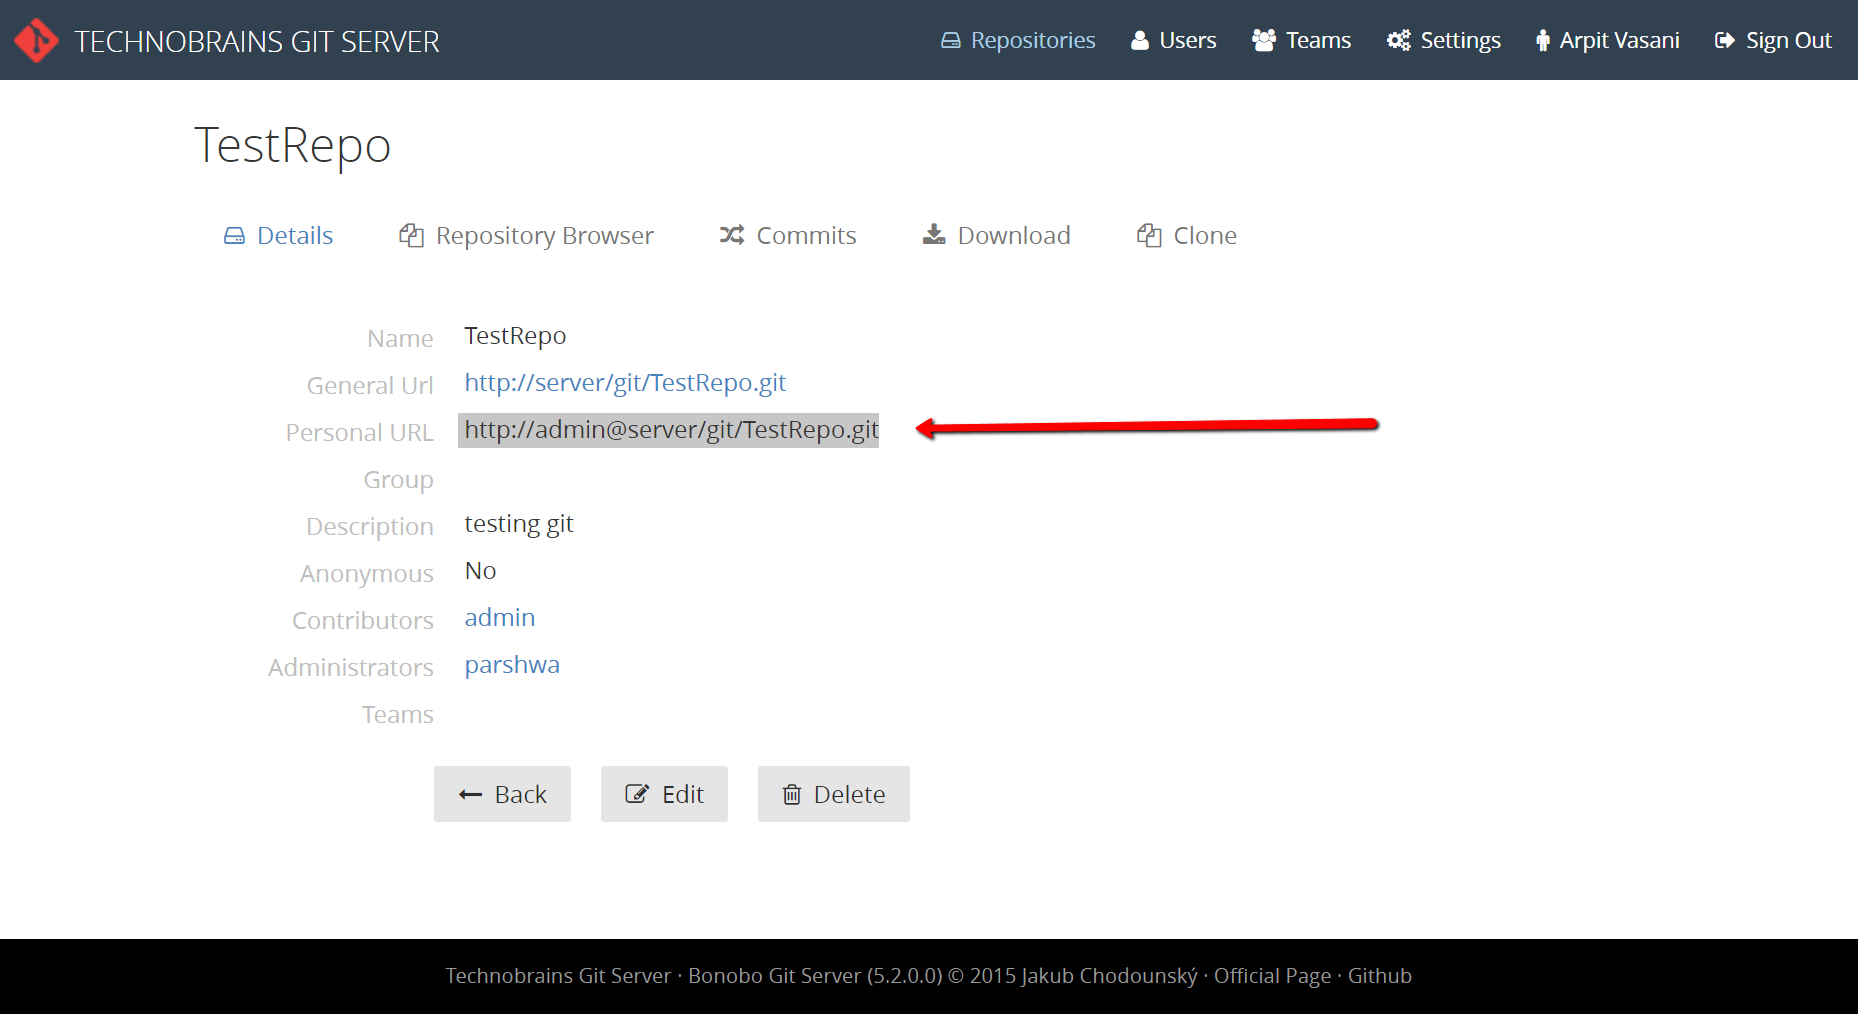
In my case URL is http://admin@server/git/TestRepo.git
Let’s move to Visual Studio. Once Visual Studio is open don’t open any projects.
First, we make sure our default Version control is GIT by going into Tools > Options > Source control
Select Git in the current source control plugin dropdown
Then open Team Explorer. If you don’t find it then go to View > Team Explorer
You’ll see a panel on the right (may depend on appearance settings)

In local Git Repositories Select Clone
Paste the repository URL in the first text box and the second text box suggests a local path to that repository, you can change it if you want.
after that unchecked the Recursively clone sub-modules checkbox and hit clone.
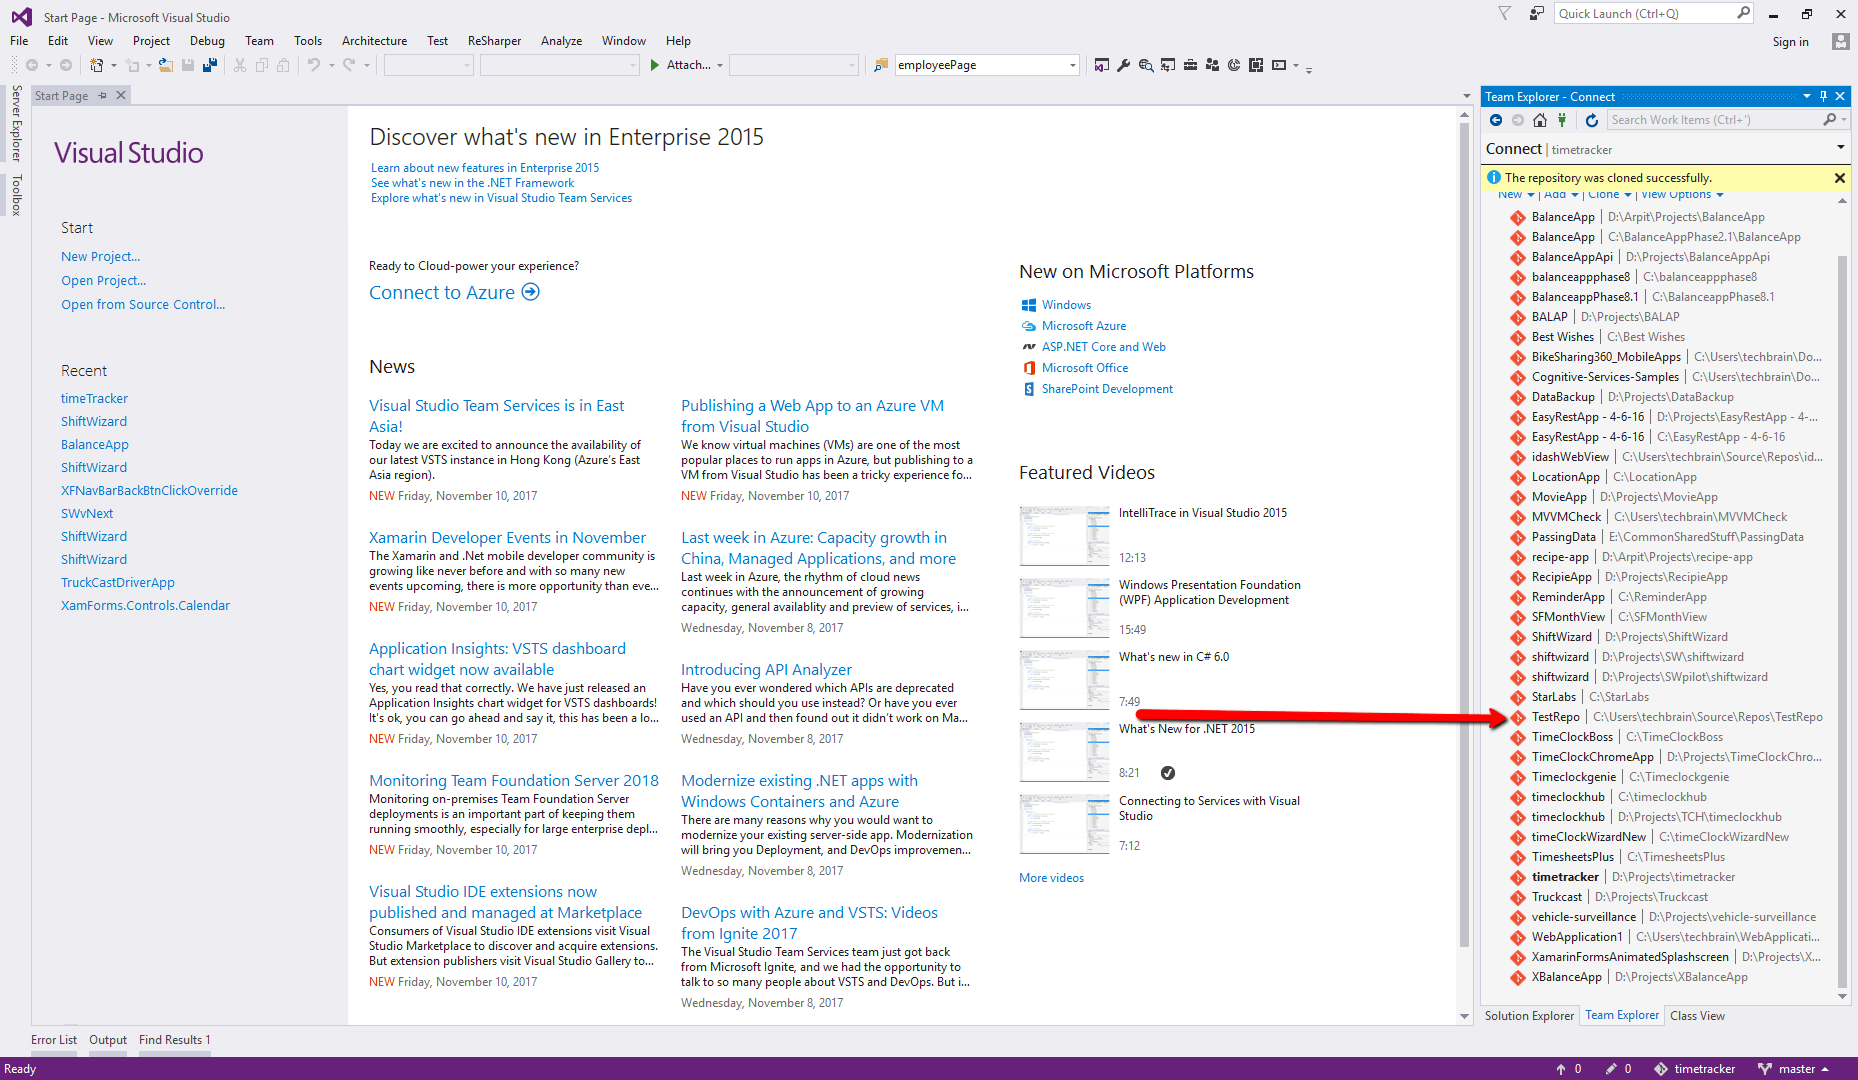
you will be, asked username and password for the server you are, accessing the repo from. once that is, successfully authenticated you will see a process bar going that represents that Visual Studio is copying files from the server.
Give it some time
Once that is done. you will see, a message like “The repository was cloned successfully”.
after that, you will see your repository in the list below.
Just double-click on that and you will see a screen like this.

This means TestRepo has been, selected as a repository.
We did it. Yay !!
If your repository has any solution file in it then it will show up in the solutions section. You can just double-click on that to start your work.
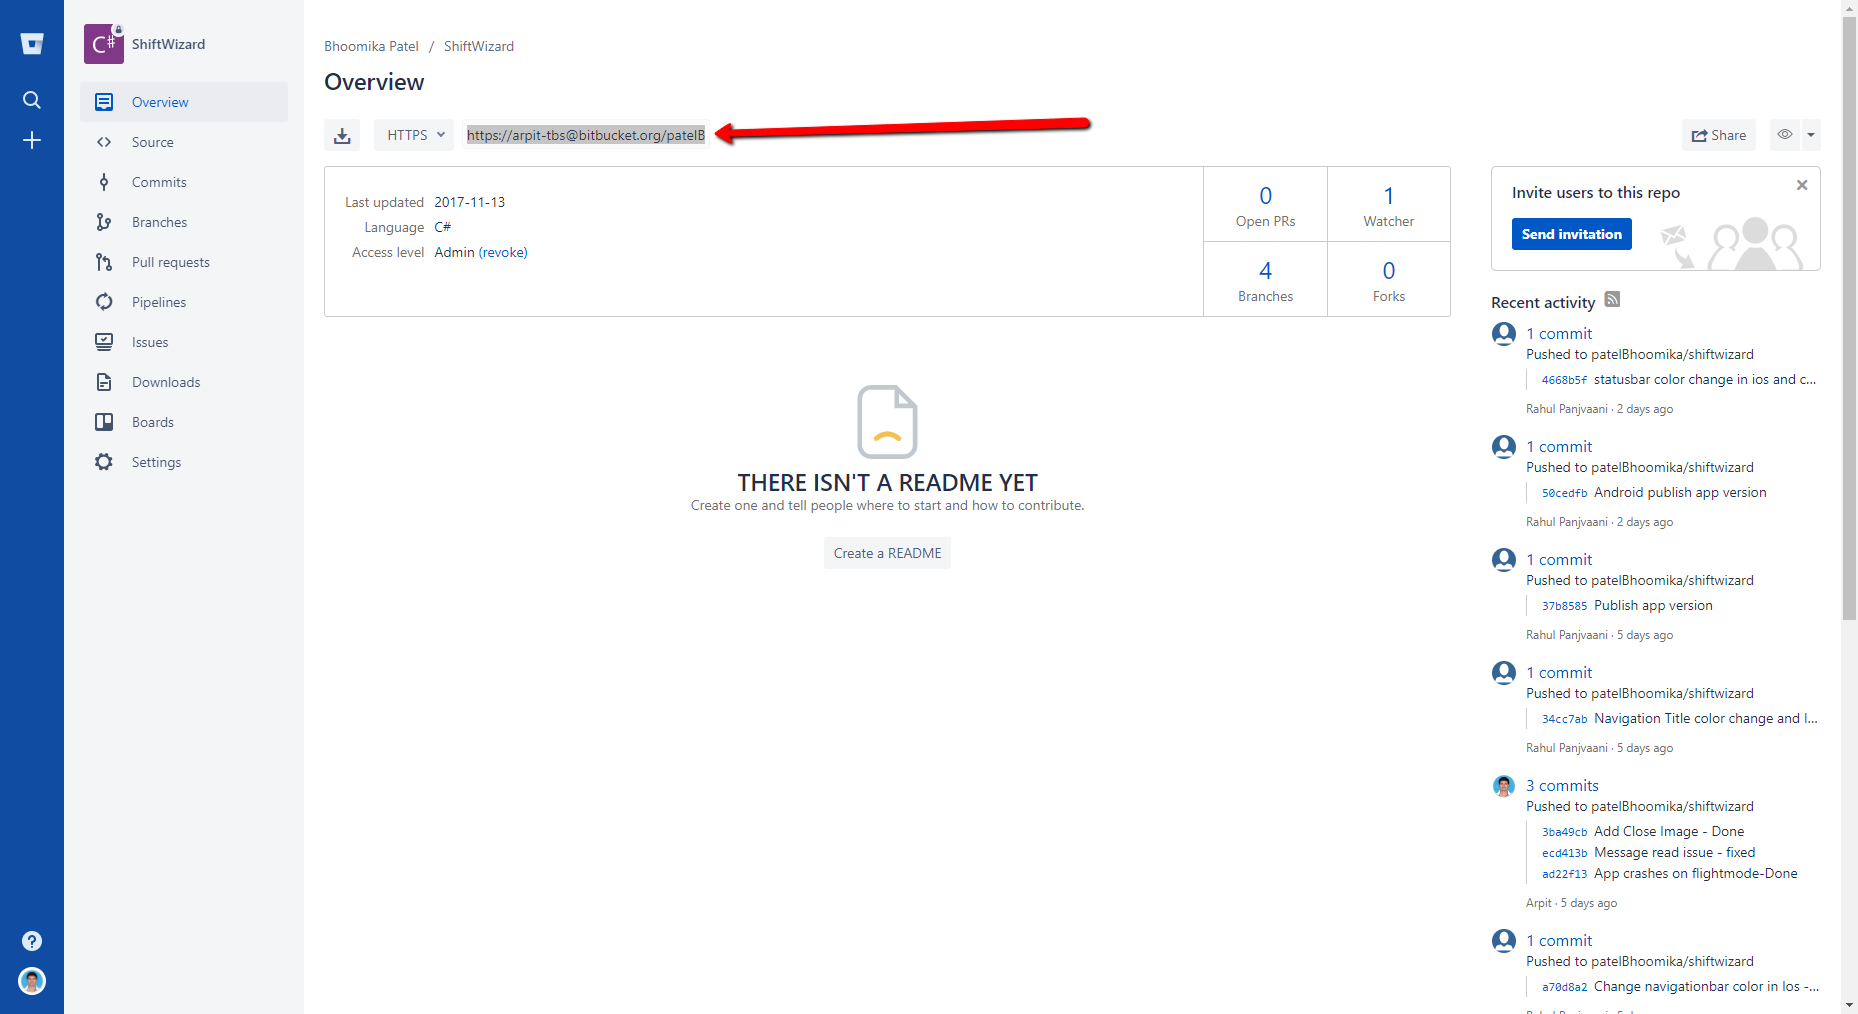
if your repository is in bit-bucket then you can take the URL from the text box given in the screenshot below
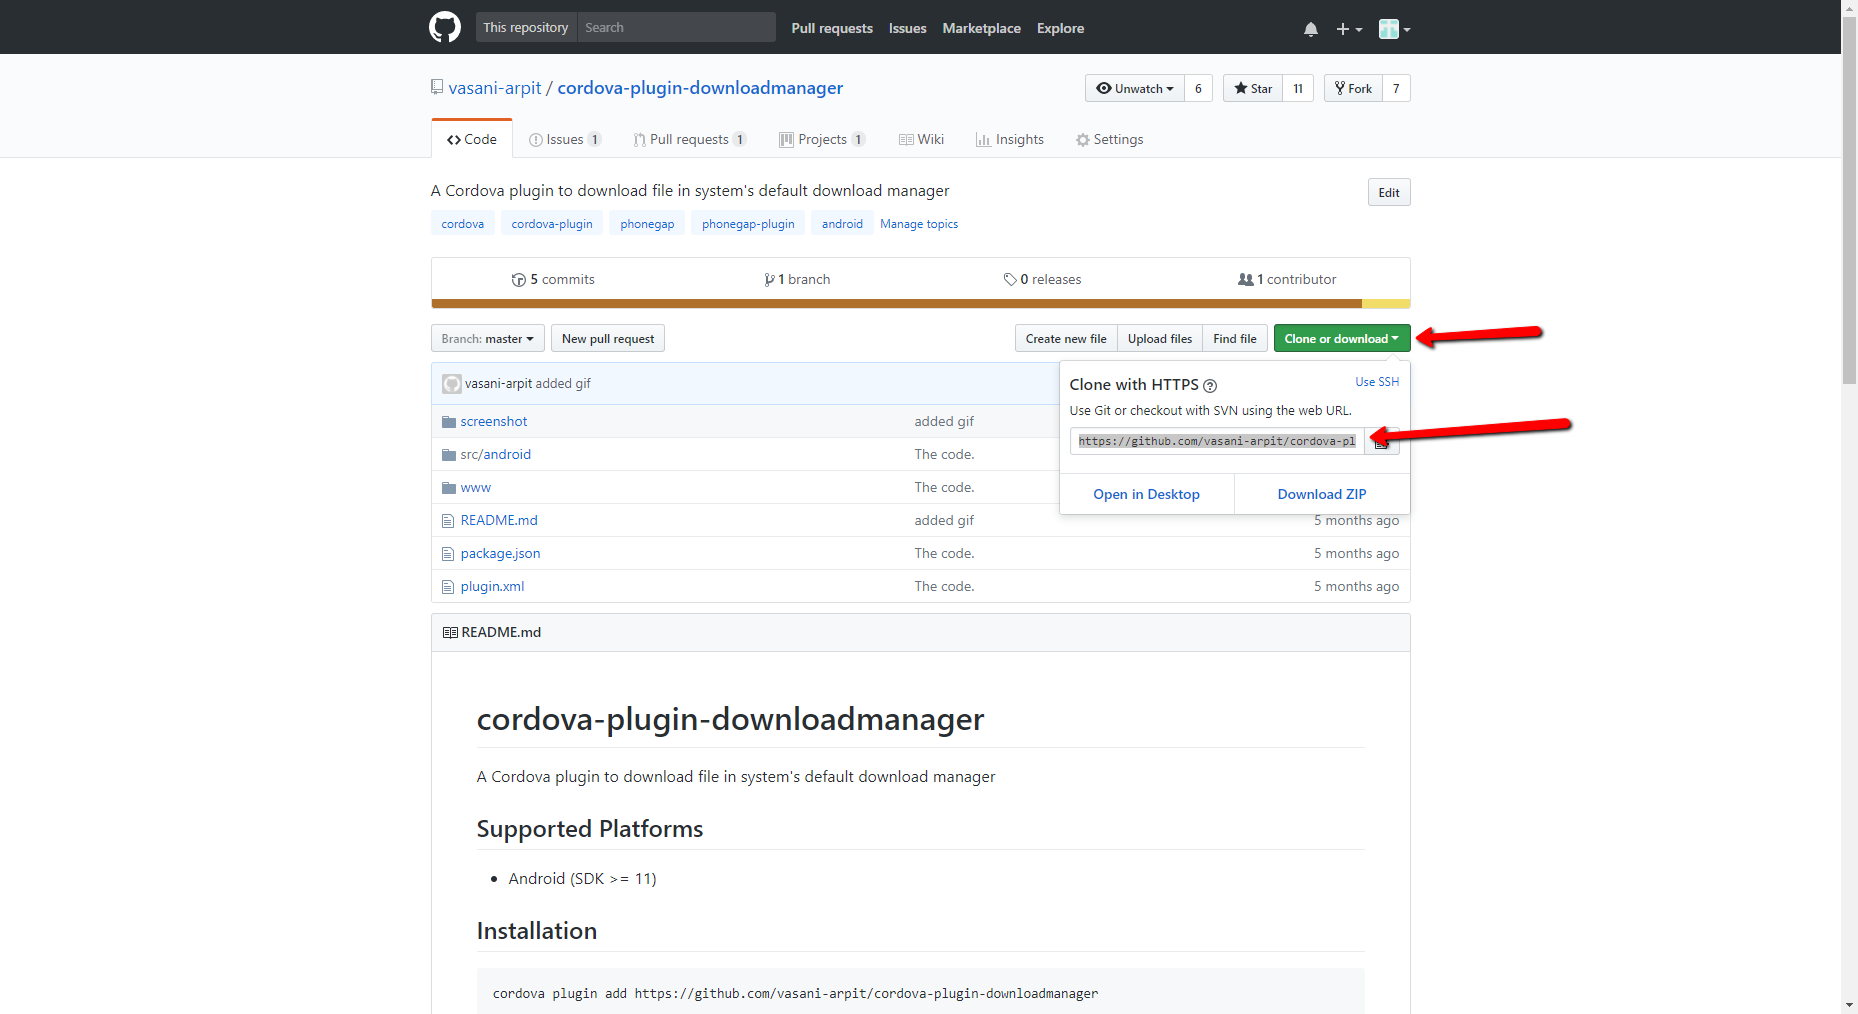
if your repository is in GitHub then you can take url from the textbox given in the screenshot below